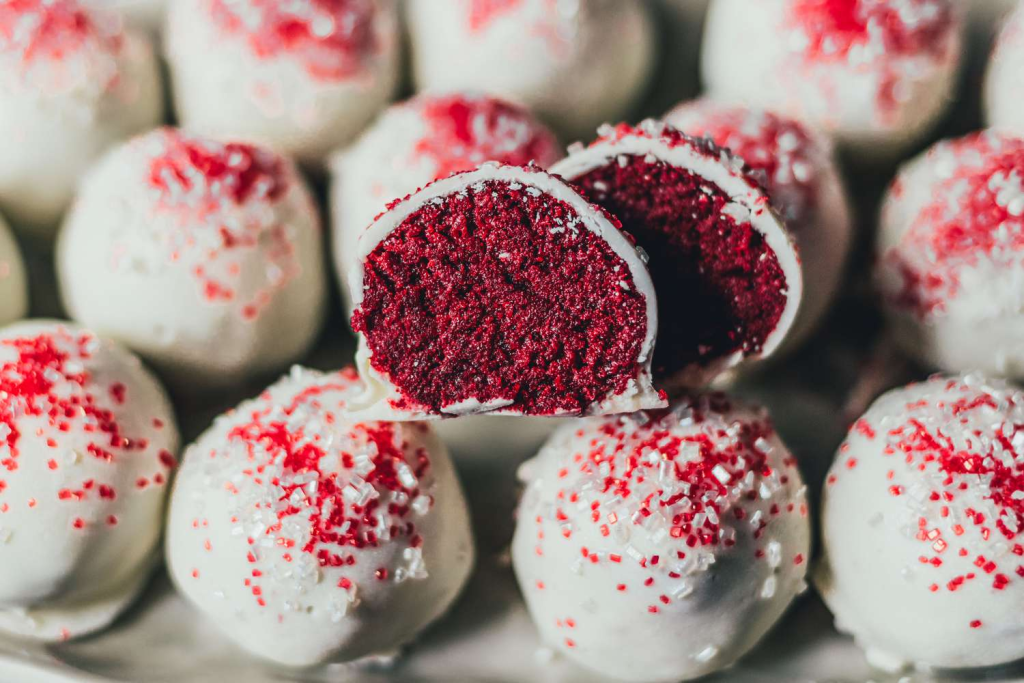
Cake pops are a delightful and fun dessert perfect for any occasion. These bite-sized treats combine the rich flavors of cake and frosting, covered in a smooth layer of chocolate or candy coating. Whether you’re making them for a party or as a simple treat for your family, using a cake mix can make the process easier and quicker. This guide will take you through a step-by-step recipe, nutritional value, variations, and commonly asked questions about cake pops made with cake mix.

Nutritional Value Understanding the nutritional profile of your cake pops can help you manage portion sizes and enjoy them mindfully. Here is an approximate breakdown for one standard-sized cake pop:
- Calories: 150-180 kcal
- Total Fat: 8-10g
- Saturated Fat: 5-6g
- Carbohydrates: 20-22g
- Sugars: 15-18g
- Protein: 1-2g
- Dietary Fiber: 0-1g
- Sodium: 80-100mg Note: Nutritional values may vary depending on specific ingredients and portion sizes.
Ingredients To make cake pops using a cake mix, you’ll need the following:

- 1 box of cake mix (choose your preferred flavor: vanilla, chocolate, red velvet, etc.)
- Ingredients listed on the cake mix box (typically eggs, water, and oil)
- 1 cup of frosting (vanilla, chocolate, or any preferred flavor)
- 2 cups of candy melts or chocolate chips for coating
- Sprinkles (optional)
- Lollipop sticks
Instructions

- Prepare the Cake: Preheat your oven according to the cake mix instructions. Prepare the cake batter as directed and bake it in a suitable pan. Allow the cake to cool completely once baked.
- Crumble the Cake: Once cooled, use your hands or a food processor to crumble the cake into fine crumbs.
- Mix with Frosting: Add the frosting to the crumbled cake. Start with half a cup and gradually add more until the mixture holds together when pressed.
- Form the Balls: Scoop out small portions of the mixture and roll them into uniform balls, approximately 1-1.5 inches in diameter. Place them on a baking sheet lined with parchment paper.
- Insert Sticks: Dip the tip of each lollipop stick into melted chocolate or candy coating and insert it halfway into each cake ball. This helps secure the stick to the cake pop.
- Chill: Place the cake pops in the refrigerator for at least 1 hour or in the freezer for 20-30 minutes.
- Coat the Cake Pops: Melt the candy melts or chocolate chips in a microwave-safe bowl in 30-second intervals, stirring between each interval until smooth. Dip each chilled cake pop into the melted coating, ensuring it is evenly covered.
- Decorate and Dry: Add sprinkles or decorations while the coating is still wet. Place the coated cake pops upright in a stand or styrofoam block to let them dry completely.
Variations

- Flavor Combinations: Try mixing different cake flavors with complementary frostings, such as lemon cake with cream cheese frosting or chocolate cake with peanut butter frosting.
- Colored Coatings: Use colored candy melts to match your theme or event.
- Infused Cake Pops: For adults, add a splash of liqueur to the frosting mix for a boozy twist.
- Seasonal Decor: Customize your decorations based on holidays like Halloween or Christmas, using themed sprinkles or edible glitter.
FAQs
Q: Can I make cake pops without frosting? A: While frosting helps bind the cake crumbs together, you can use other binders such as cream cheese or a flavored yogurt for a less sweet option.
Q: How long do cake pops last? A: Store cake pops in an airtight container at room temperature for up to 5 days or refrigerate for up to 1 week.
Q: Why do my cake pops crack? A: Cracking usually occurs when there is a significant temperature difference between the chilled cake pop and the warm coating. Ensure the cake pops are not too cold before dipping.
Q: Can I freeze cake pops? A: Yes, uncoated cake balls can be frozen for up to 3 months. Coat them after thawing to room temperature for the best results.
Enjoy making these delightful cake pops and share them with your friends and family for any celebration or as a sweet snack! They’re sure to bring joy to any gathering.


